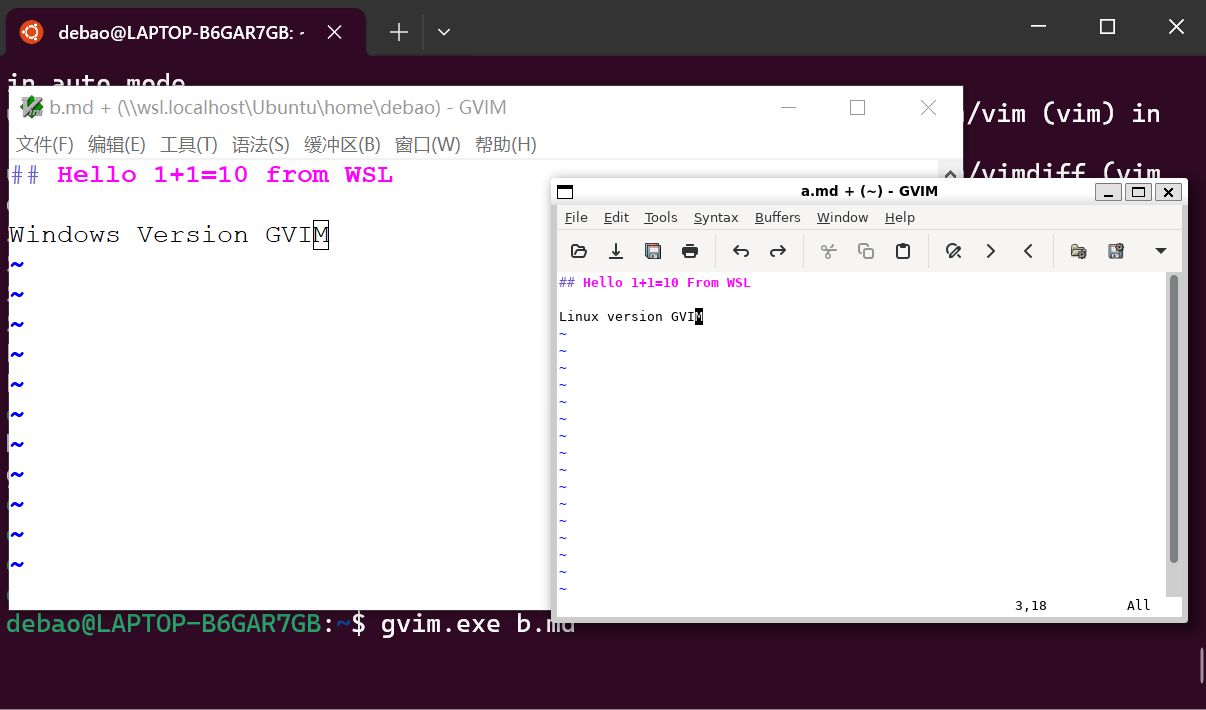
稍微梳理一下
WSL 是什么
WSL,全称为Windows Subsystem for Linux,是微软在Windows操作系统中引入的一项功能,旨在使用户能够在Windows上原生运行Linux的命令行工具和应用程序。
WSL1
2016年,WSL的第一个版本在 Windows 10 周年更新中推出。它允许用户在 Windows 上运行 Linux 程序,而无需使用虚拟机或双系统。
WSL1 通过一个抽象层翻译 Linux 的系统调用(syscall),将其映射到 Windows 系统调用。本质上是一个兼容层,而非完整的 Linux 内核。
只支持Ubuntu,也叫过 “Bash on Ubuntu on Windows” 或 “Bash on Windows”。
由于没有原生 Linux 内核支持,某些复杂的系统调用和应用程序(例如 Docker)无法运行。
WSL2
- 2019年,微软在Build 开发者大会上正式宣布 WSL2。WSL2 引入了完整的 Linux 内核,运行在 Hyper-V 虚拟机中。
- 2020年,Docker Desktop 开始支持 WSL2。
- 2021年,微软为 WSL 引入了 WSLg,使用户可以运行 Linux 桌面应用和 GUI 程序。同时,提供 GPU 支持(GPU Compute),专注于硬件加速。
- 2022年,WSL 从 Windows 功能中独立出来,通过 Microsoft Store 提供更快的更新频率。
文件系统
2024马上要结束了。只考虑 WSL2 下面的 Ubuntu24.04 情况
而Windows和Linux的目录结构则通过挂载机制和特定路径关系实现互通。
Linux的文件系统
WSL2的Linux文件系统是运行在虚拟化的Linux内核上的,与Windows的文件系统是分开的。这个文件系统通常存储在Windows文件系统中的一个虚拟磁盘文件(VHDX格式)。
每个WSL2发行版的文件系统存储在Windows文件系统中的一个特定位置,通常路径类似:
1 | |
注意,其中 <LinuxDistro> 长这个样子:CanonicalGroupLimited.Ubuntu_79rhkp1fndgab
借助后面的 wsl.exe,可以将Linux文件系统移动到其他盘符下面。
Linux下访问Windows文件系统
WSL2允许通过挂载访问Windows文件系统中的文件。可以在Linux环境下访问Windows的目录,Windows系统的文件会通过挂载点提供给WSL2。具体路径如下:
- Windows的C盘通常被挂载到WSL2的 /mnt/c/ 目录下。
- 例如,Windows中的
C:\Users\<Username>在WSL2中对应/mnt/c/Users/<Username>。
- 例如,Windows中的
- 其他Windows盘符(如D盘、E盘等)通过
/mnt/d/、/mnt/e/等方式提供访问。
挂载?
在Linux下,WSL2的文件系统(如 /mnt/c)是通过Windows的虚拟化层挂载的。 WSL2本身没有一个传统的“挂载配置文件”
可以通过 mount 命令查看:
1 2 | |
通过 /etc/fstab 看不出东西:
1 2 | |
如果要修改加载行为,需要使用
/etc/wsl.conf文件。
Windows访问Linux文件系统
你可以通过Windows资源管理器访问WSL2中的文件。路径是:
1 | |
例如对于Ubuntu来说,路径是:
1 | |
wsl.exe
wsl.exe 是 Windows Subsystem for Linux (WSL) 的命令行工具,用于在 Windows 上管理和与 WSL 实例交互。
一些常见功能:
启动和运行 WSL 实例
- 启动默认 WSL 实例:
wsl - 启动指定的发行版:
wsl -d <DistroName> - 停止所有 WSL 实例:
wsl --shutdown - 停止指定实例:
wsl --terminate <DistroName>
管理 WSL 发行版
- 安装发行版:
wsl --install -d <DistroName> - 列出已安装的发行版:
wsl --list --verbose - 设置默认发行版:
wsl --setdefault <DistroName> - 切换 WSL 版本:
wsl --set-version <DistroName> <Version> - 导出发行版:
wsl --export <DistroName> <FilePath> - 导入发行版:
wsl --import <DistroName> <InstallLocation> <FilePath>
帮助及其他
- 运行Linux下的命令:
wsl <command> - 查看命令帮助:
wsl --help
wsl.conf
配置文件 wsl.conf 位于每个Linux的 /etc/ 目录下,路径为 /etc/wsl.conf。
wsl.conf 文件使用 INI 文件格式(键值对和段落格式),例如,默认情况下:
1 2 | |
通过它可以控制自动挂载、网络设置、默认用户等关键功能。配置后:
1 2 3 4 5 6 7 8 9 10 11 12 13 14 15 16 17 18 19 20 21 22 23 24 25 26 27 28 29 30 31 32 33 | |
VSCode 与 WSL
VSCode下面由WSL扩展,安装后,可以:
- 在Linux下,直接输入 code
- 或,在Windows下,直接输入 wsl code
- 或,在打开的VSCode中,Ctrl+Shift+P,中,
WSL: Connect to WSL in New Window
然后就可以使用Linux下的g++ 或 Python 等工具链了。
如何工作的?
当在 WSL 下的Linux中运行 code 时,实际执行的是 Windows 上的 code.exe,验证一下:
1 2 | |
这是一个bash的脚本文件,它里面会调用真正的 code.exe 程序。
是的,WSL下的Linux中可以启动exe,比如notepad.exe 或 calc.exe。这是通过 Windows 提供的 Interop(互操作性) 功能实现的。
WSLg
WSLg(Windows Subsystem for Linux GUI)是 Windows Subsystem for Linux (WSL) 的一个扩展功能,允许你在 Windows 10 或 Windows 11 上运行 Linux 图形用户界面(GUI)应用程序,并且与 Windows 上的应用程序无缝集成。
WSLg 使得我们能够在 Windows 中直接运行 Linux 图形应用程序,比如 GIMP、Firefox、KDE、X11 应用等,而不需要额外的虚拟机或复杂的配置。

WSLg 目前主要优化的是 运行单一应用程序 的图形界面,而不是提供完整的桌面环境。
参考
- https://learn.microsoft.com/en-us/windows/wsl/
- https://ubuntu.com/desktop/wsl
- https://learn.microsoft.com/en-us/windows/wsl/wsl-config
- https://en.wikipedia.org/wiki/Windows_Subsystem_for_Linux