前面,我们了解了python程序与GitHub Action的结合,也稍微学习了如何让GitHub Action调用我们本地Ubuntu和Windows下的Runner。接下来回到学习的初衷:一步一步,以一个简单的Qt程序仓库为例,看看如何添加GitHub Actions的 CI 支持。
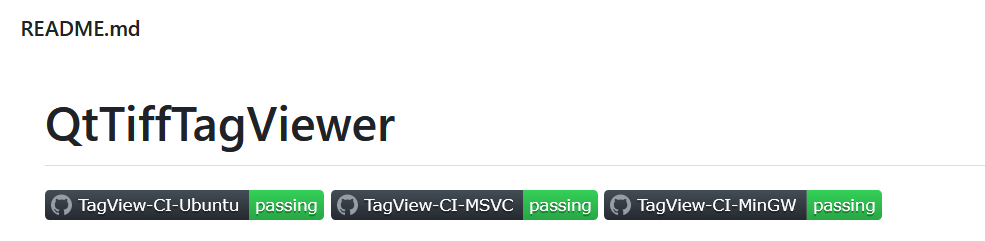
本文实现最终效果如下:
准备工作
Qt安装方式
Qt目前对非商业用户不太友好。离线安装包仅对商业用户提供,在线安装包不容易用于静默安装。对于runner来说,安装Qt是个不小的挑战。
有大神写了 Another Qt installer(aqt),其他大神基于它写了Github适用的install-qt-action:
- https://github.com/miurahr/aqtinstall
- https://github.com/jurplel/install-qt-action
使用这个工具时,想要找有哪些Qt的东西可以配置,可通过这个网站交互式查询 https://ddalcino.github.io/aqt-list-server/
即使不使用CI,装机时直接使用aqt安装Qt也是一个不错的选择。
另外,Qt官方blog也展示了不使用这个action的做法。它用的workflow文件看起来还是相当头大。
代码仓库
编写一个简单的Qt程序,推送到Github中,此处直接使用 QtTiffTagViewer仓库。这是一个不依赖其他第三方库的Qt程序,采用cmake进行构建。
构建环境
这个是最乱的,好在MSVC2015Update2之后的MSVC各个版本微软基本都兼容了,不用Qt和MSVC一一配对了。
- Qt 支持跨平台编译,此处只考虑Ubuntu和Windows两个平台下的Destop的amd64版本。
- Windows上先考虑MSVC,跑通后再考虑 MInGW。
workflow文件
首次尝试(版本1)
增加一个ci文件: .github/workflows/tagview_ci.yml
内容比较直观:
- 安装Qt(默认arch)
- 下载我们源码
- cmake构建
需要注意,因为下载的Qt是MSVC版本而不是MinGW版本的,所以里面用了 ilammy/msvc-dev-cmd,这个用于配置MSVC的脚本环境,不然Windows下程序构建无法进行。
1 2 3 4 5 6 7 8 9 10 11 12 13 14 15 16 17 18 19 20 21 22 23 24 25 26 27 28 29 30 31 32 33 34 35 | |
运行比较顺利,结果:
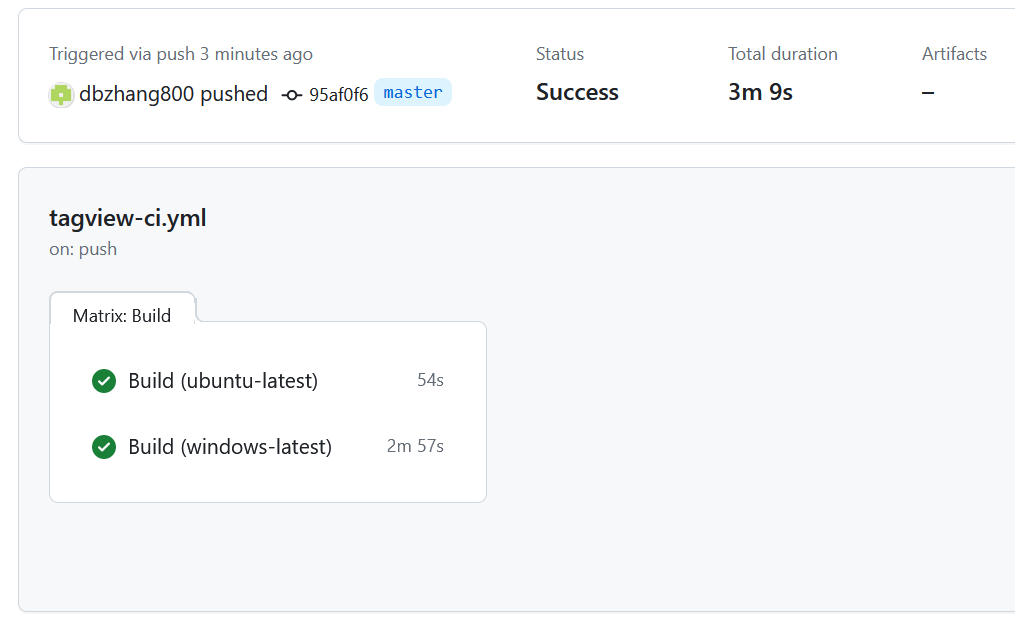
构建速度上,Windows比Ubuntu下慢了不少。
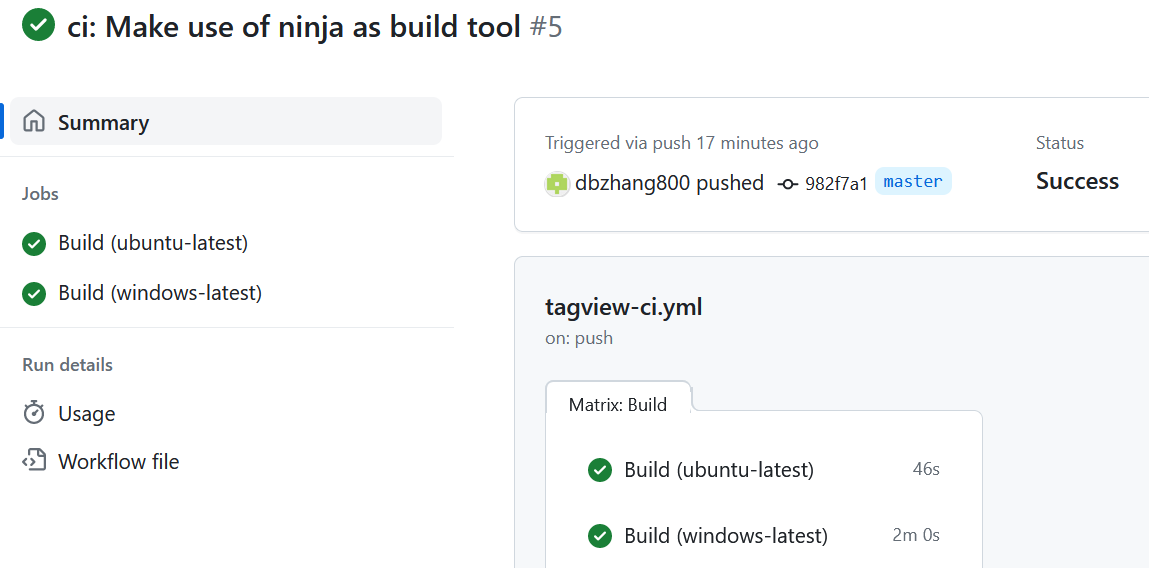
使用ninja构建(版本2)
让cmake统一使用 ninja构建,修改ci文件如下:.github/workflows/tagview_ci.yml
- 增加了下载 Ninja的阶段(注意,在Windows下,使用了 Chocolatey 包管理器)
- 配置cmake命令使用Ninja
1 2 3 4 5 6 7 8 9 10 11 12 13 14 15 16 17 18 19 20 21 22 23 24 25 26 27 28 29 30 31 32 33 34 35 36 37 38 39 40 41 42 | |
运行结果
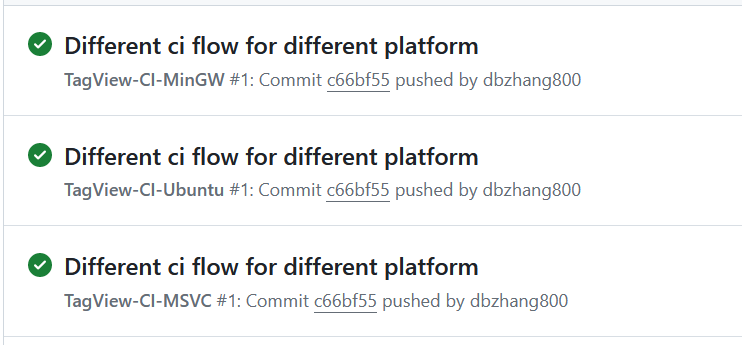
拆分workflow(版本3)
Qt在 Ubuntu和Windows下有不小差异,在统一个文件内进行配置,需要大量的条件判断。感觉不如拆成多个文件好维护。
除了版本2直接拆分成 tagview-ci-msvc.yml和 tagview-ci-ubuntu.yml之外,再新增一个tagview-ci-mingw.yml:
1 2 3 4 5 6 7 8 9 10 11 12 13 14 15 16 17 18 19 20 21 22 23 24 25 26 27 28 29 30 | |
结果:
README中显示CI徽章
直接添加如下三行代码:即可得到一开始的页面效果:
1 2 3 | |
不过,这几个yml文件名字太长了,后面把前缀去掉,可能更好些。
不管如何,流程跑通,先这样了,后面在看如何release CI生成的产物。
参考
- https://github.com/marketplace/actions/install-qt
- https://www.kdab.com/github-actions-for-cpp-and-qt/
- https://www.qt.io/blog/building-qt-creator-plugins-with-github-actions
- https://medium.com/@TomRvr/continuous-integration-qt-github-linux-build-b3443084e7
- https://medium.com/@TomRvr/continuous-integration-for-a-qt-project-with-github-b19a33b39980
- https://docs.github.com/en/actions/monitoring-and-troubleshooting-workflows/adding-a-workflow-status-badge